Your app is all set and ready to hit the app stores! But before you swing those digital doors wide open, there’s one last thing to tackle – making your app look fantastic on both iOS and Android.
If you’re coming from the native app development world, these configurations might already be familiar to you. If not, don’t worry – this guide will walk you through customizing your app’s name, designing an eye-catching icon, and creating an impressive splash screen that will captivate your users from the start.
1. Change App Display Name
Objective:
- The name users can see on their device home screen
- Be concise and memorable
- Optimal length: 30 characters for iOS & Android
1.1. Change name for Android
To change App Display Name for Android side, if you navigate to your App_Resources/Android/src/AndroidManifest.xml, you found something like this:
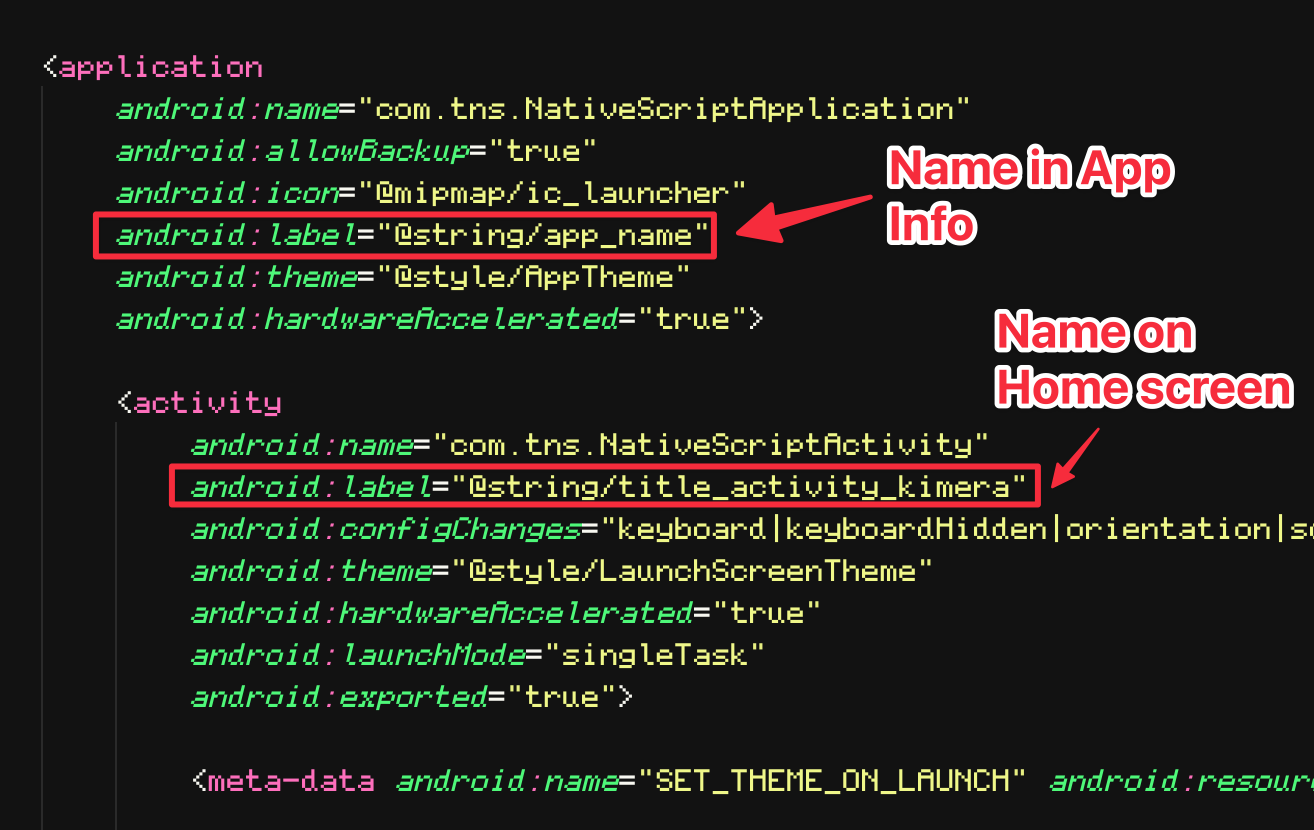
Although it is totally fine to insert the name you want directly in here. It is best practice to leave the placeholder here and create a strings.xml file to override `@string/…` parts.
Btw the way, not sure if it is a bug and expected behavior `@string/app_name` will be replaced with the project directory its self. So I recommend to change it to sometimes else such as: @string/app_info_name, like this:
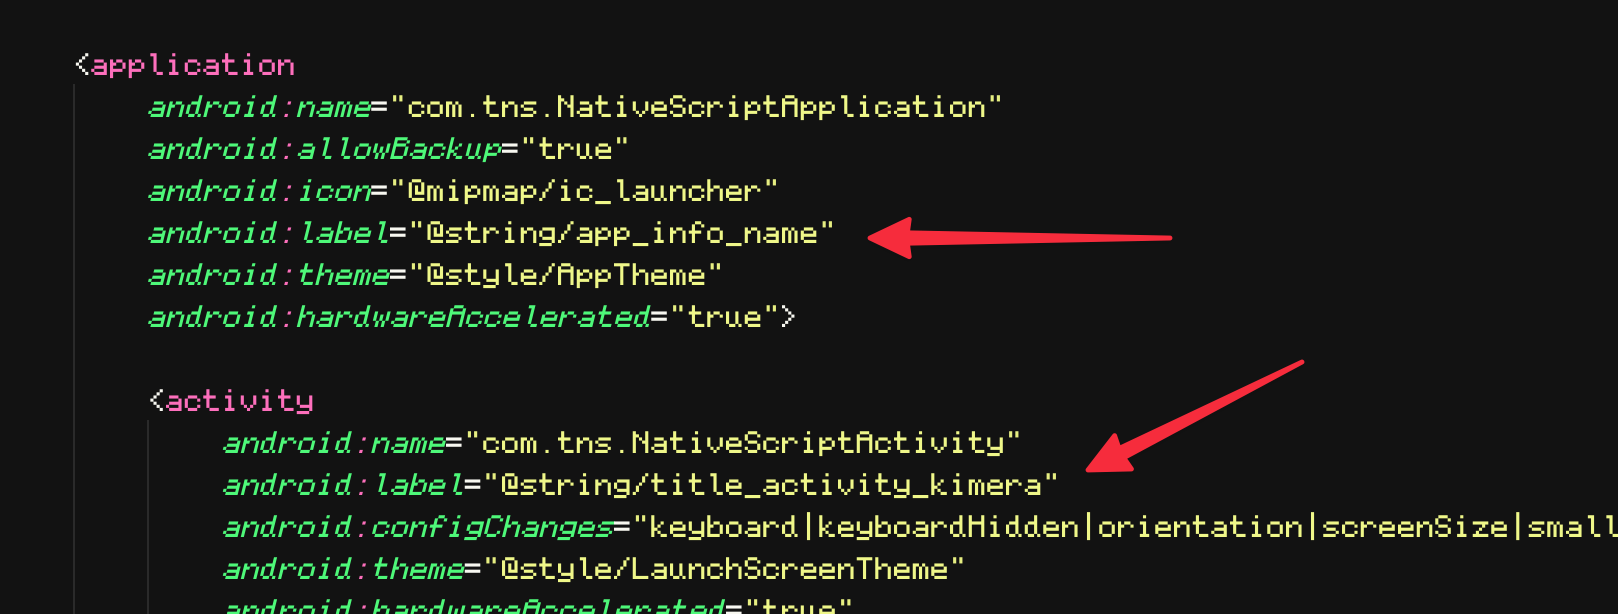
Then we now we can finally, override those placeholder by setting up App_Resources/Android/src/main/res/values/strings.xml (create it, if not existed yet), with content like this:
<xml version="1.0" encoding="utf-8"?>
<resources>
  <string name="app_info_name">NewbieScripter App</string>
  <string name="title_activity_kimera">NS</string>
</resources>
The reason behind using strings.xml file is then you can later translate your app name into multiple language by separating it via different values directory such as values-es/strings.xml, values-vi/strings.xml, etc.
Notice: The name is expected to be under 30 characters.
1.2. Change name for iOS
For iOS, App_Resources/iOS/Info.plist file is where we should look at.
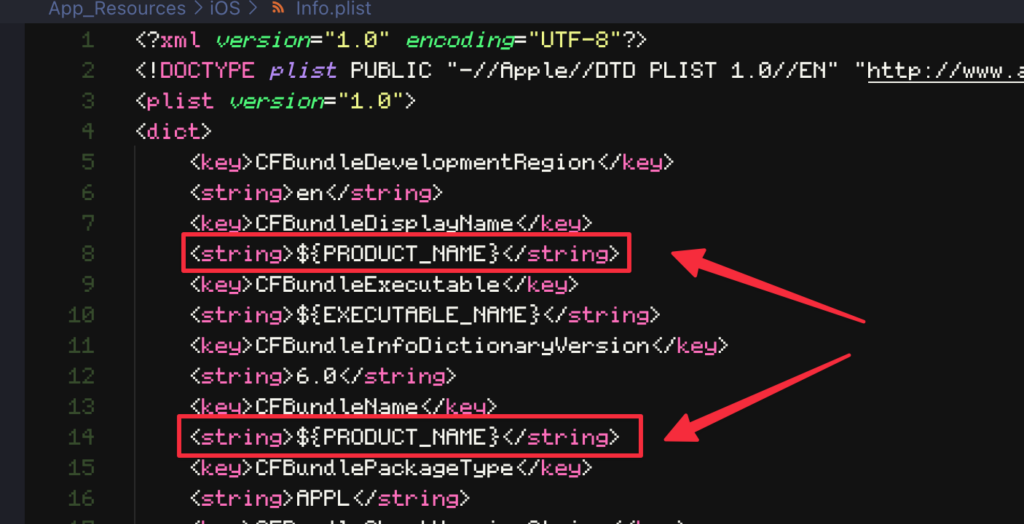
Explain:
CFBundleDisplayNameis your app name, it will be used in almost every place OS display your app: Home screen, Settings, etc. Max length allowed is 30 characters.CFBundleNameis a short name of your app. There is a funny myth about where this name is actually used, I believe it is used in iTunes library. And its gotta be short. Under 16 characters, so be careful.
2. Change the App Icon
Objective:
- Keep your app standing out from the forest of apps
- Represent your branding
- Icon must be clean & sharp on different screen resolution
2.1. Prepare your icon
For best resolution on all screens, preparing your app icon in at least 1024 x 1024 size to get the best quality on all known screen resolution. If you don’t plan to support tablet devices. It is okay to use lower size app icon, for ex: 512 x 512. (Bear in mind that, you are gonna need a 512 x 512 app icon image to submit app to CH Play anyway)
PNG format would be the best.
2.2. Generate app icons for multiple screen sizes
Now come to the fun part. If you are hard-core developer coming from Native App development world, you would know that you need somehow to generate different resolution for your app icon and put it in correct folders.
For Android, you will need to put it in res/drawable, drawable-ldpi (for low resolution device), drawable-mdpi (medium), drawable-hdpi (you know it), etc. For iOS, it would go to the *.xcassets, then later set AppIcon to this assets package in XCode.
Lucklily for us, NativeScript cli coming with a pretty useful command:
ns resources generate icons {pathToImageFile}This will lift our burden, take the input app icon image and turn it into multiple desired formats, and put it in corresponding directories as well. In case your app icon has a transparent background, you may want to pick a background color for the icon to be displayed on. This can be achieved with the –background option (default value is transparent).
ns resources generate icons {pathToImageFile} --background '#ffffff'3. Change the App Splash screen (draft)
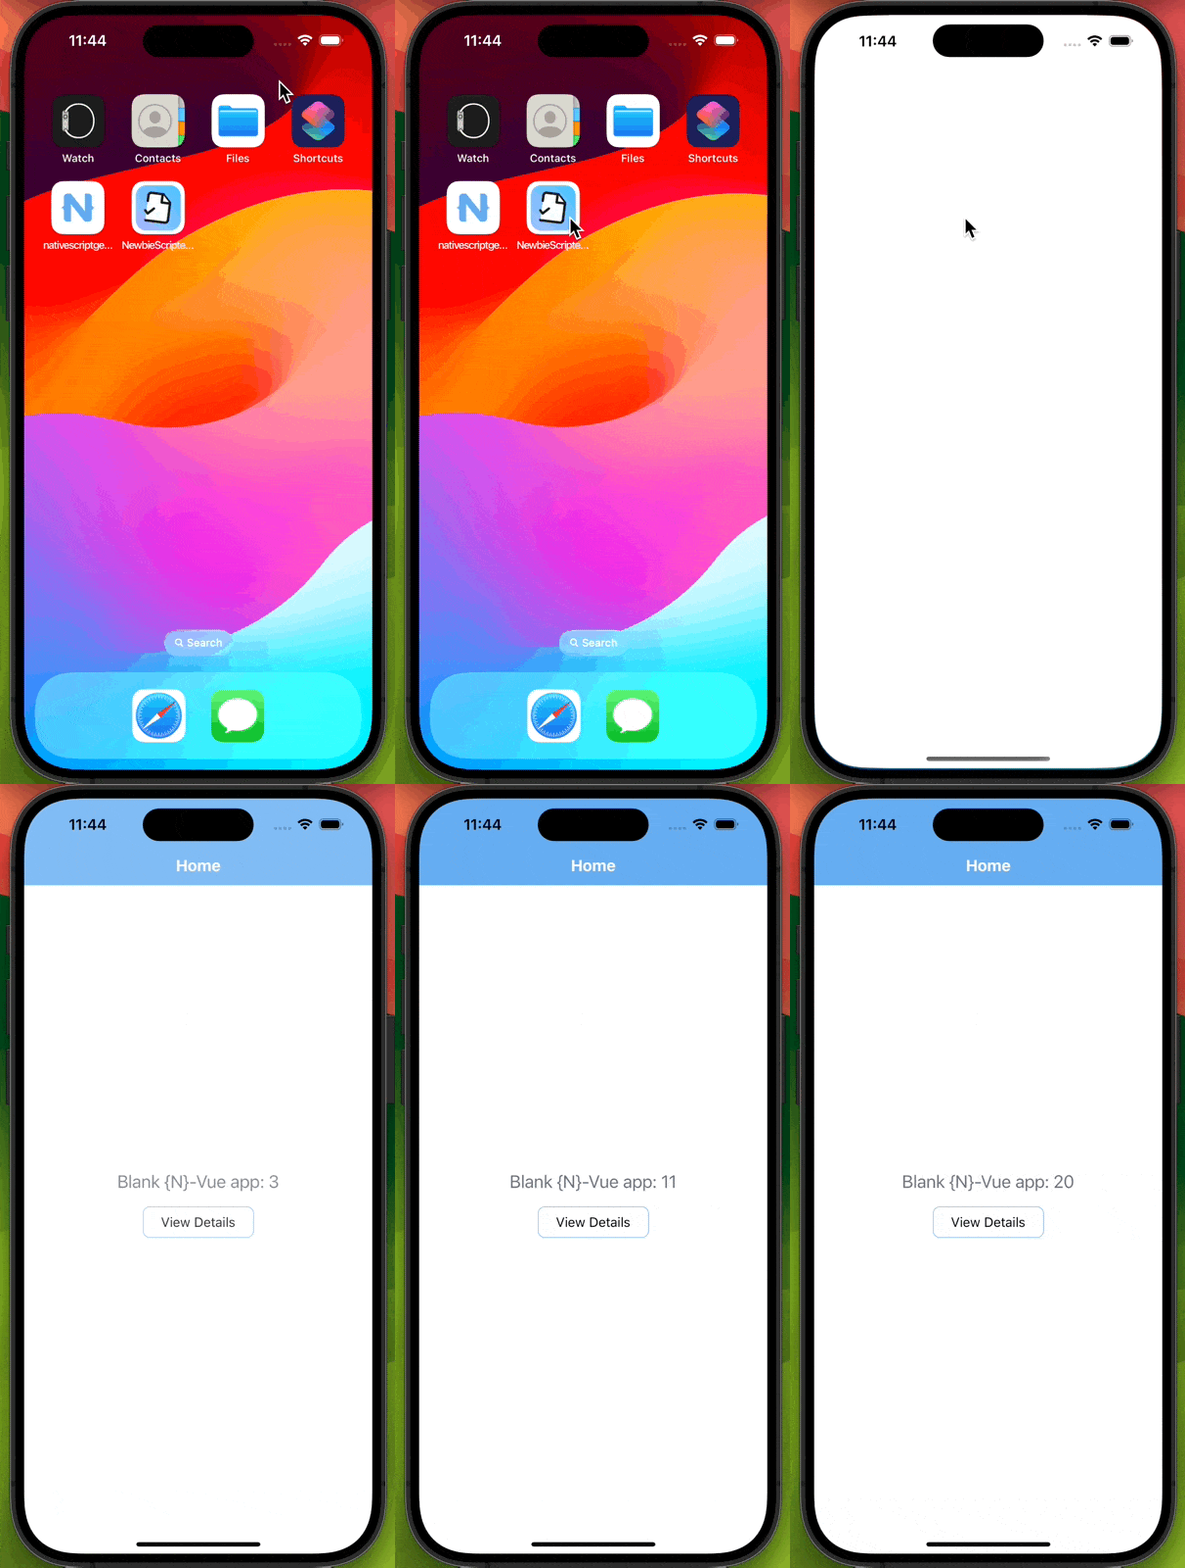
The splash screen is the visual display that appears when a user opens the app and waits for it to fully load. In the newly created NativeScript Vue 3 project, it looks like this video:
Unfortunately, it’s quite plain and uninteresting.
While the NativeScript CLI does have a command called ns resources generate splashes that can automatically generate a splash screen, it’s currently broken for iOS based on my testing. Therefore, we’ll have to revert to the old method by accessing the XCode project and making customizations from there.
For Android only, you can still use the CLI. What you need is artwork to display on the splash screen; it can be any image. It can be your logo, some mascots, or a visual that represents your company. Again, it is recommended to use an image that is at least 1024 x 1024 in size for the best fit on all screen resolutions.
ns resources generate splashes {pathToTheImage} --background '#ffffff'It is exactly same as generating logo. --background option is optional, and value will be transparent if ommited. And here is the result:

This section is not completed. Although the CLI can help generate a basic splash screen, in the next parts of the tutorial, we will dive deep into iOS and Android platforms to fine-tune the perfect splash screen tailored for our app.

