

WebSocket isn’t supported by default in NativeScript, but you can easily add it to your project with a third-party plugin. In this article, I’ll guide you on how to leverage this amazing WebSocket as an efficient communication channel and explore more practical use cases within your NativeScript Vue app.
WebSocket is a bidirectional, full-duplex protocol that establishes a persistent, low-latency connection between a client (like a browser) and a server. Once set up, both sides can send data instantly—no waiting for requests or page refreshes. It’s like a phone call compared to endless text messages.
Install package @valor/nativescript-websockets
There are numerous plugins available for NativeScript to connect to a WebSocket, and my personal favorite is @valor/nativescript-websockets. What makes this package great is that it doesn’t add any extra classes for you to import. It actually polyfills the WebSocket class into your project, allowing you to use it just as you would in a web environment.
To install this wonderful package, use npm command as below:
npm i --save @valor/nativescript-websocketsConnect to a WebSocket & send message
If you’re already familiar with using WebSockets in a web environment, this step should be straightforward since the APIs for web and NativeScript are the same.
However, if you’re not familiar, don’t worry. I’ll guide you through the basic usage of WebSocket in NativeScript. First, we need to create a WebSocket instance using:
let ws = new WebSocket('wss://echo.websocket.org/');echo.websocket.org is a free public WebSocket server that simply echoes back whatever you send to it, making it an ideal test target for the purposes of this article.
After creating a WebSocket instance, make sure to set up some basic event listeners so you’re aware of what’s happening with your WebSocket connection:
ws.onopen = () => {
  console.log('WebSocket is open');
};

ws.onmessage = (event: MessageEvent) => {
  console.log('WebSocket message received:', event.data);
};

ws.onerror = (event: Event) => {
  console.log('WebSocket error:', event);
};
Explanation:
- onopen: This event is triggered immediately after the WebSocket connection is established.
- onmessage: This event occurs whenever a message is received from the WebSocket server.
- onerror: This event provides detailed information whenever an error occurs during the connection, such as connection closures or transmission errors. It’s a good idea to monitor errors and adjust your UI/UX accordingly.
Instead of ws.onmessage. You may use ws.addEventListener("message"), if you plan to add multiple listener to this WebSocket instance.
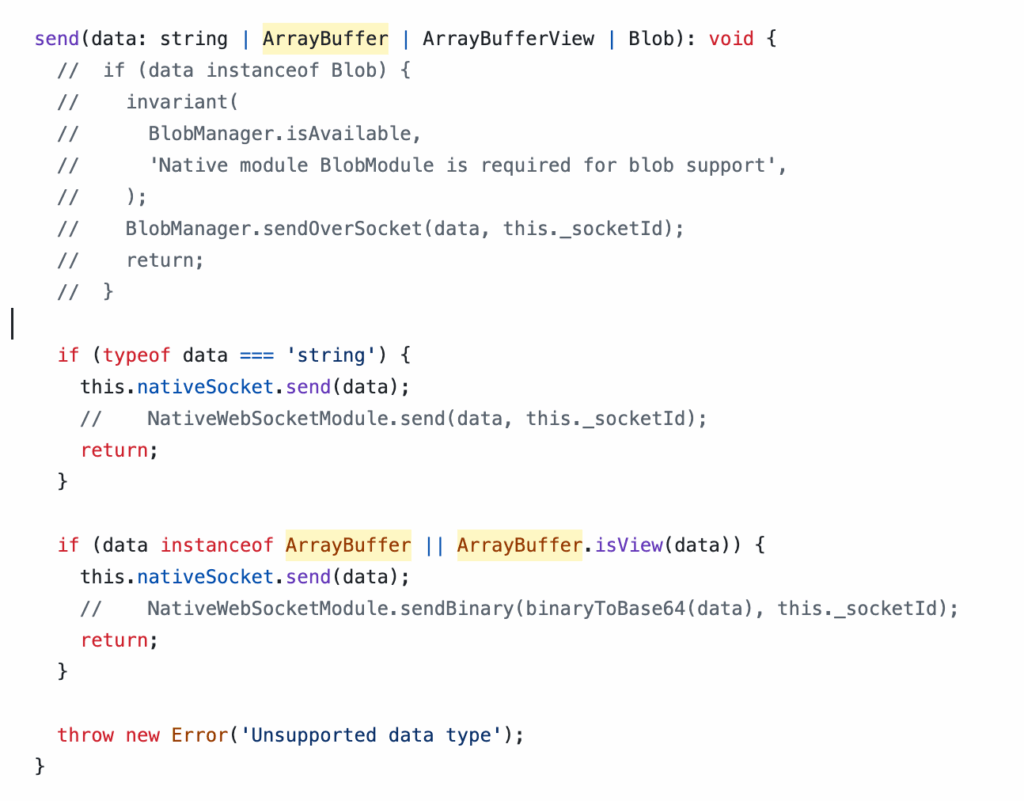
Now we have a way to handle incoming messages, but we still need a method to send messages from our app to the target WebSocket. To do this, simply call:
ws.send("Your message");In above call, our app will send a plain text message to the target WebSocket server. If you are curious, beside text we can also send binary in form of ArrayBuffer, ArrayBufferView or a Blob. Here is how underlying send() interface look like, if you are curious:
Above is my brief crash course on the WebSocket API. For a detailed guide, the team at Mozilla has done an excellent job with their documentation. If you’d like to learn more about the WebSocket API, check out their guide here: Mozilla WebSocket API Guide.
Some catches along the road
Here are some challenges I encountered that had me scratching my head. I thought I should share these to help others avoid the same mistakes.
WebSocket and Vue’s reactive are not playing along well
Avoid using a ref to hold the WebSocket instance. If you attempt to call send() on the ref variable, something undesirable will happen, causing your app to crash immediately with the following message:
[Vue warn]: Unhandled error during execution of native event handler
    at <Home>
  ***** Fatal JavaScript exception - application has been terminated. *****
  NativeScript encountered a fatal error:
  Uncaught Error: +[RCTSRWebSocket send:]: unrecognized selector sent to class 0x1086e87c8
   at
        send(file: src/webpack:/nativescript-websockets/node_modules/@valor/nativescript-websockets/bridge.ios.js:81:0)
        at send(file: src/webpack:/nativescript-websockets/node_modules/@valor/nativescript-websockets/websocket.js:139:0)
I tried to investigate the issue and, as far as I can tell, Vue’s reactivity seems to interfere with the send() method somewhere. So, it’s best to avoid that. Simply declare your WebSocket variable as a normal variable:
let ws = new WebSocket(...);Use Worker API if you need to send big nasty binary
As previously mentioned, ws.send() can also accept binary data in the form of an ArrayBuffer or Blob. If you plan to read, send, and receive large chunks of binary data through WebSocket, I recommend using the Worker API, as documented here: NativeScript Multithreading Guide.
Due to the real-time nature of WebSocket, you don’t want your main thread to get bogged down with sending and receiving data.
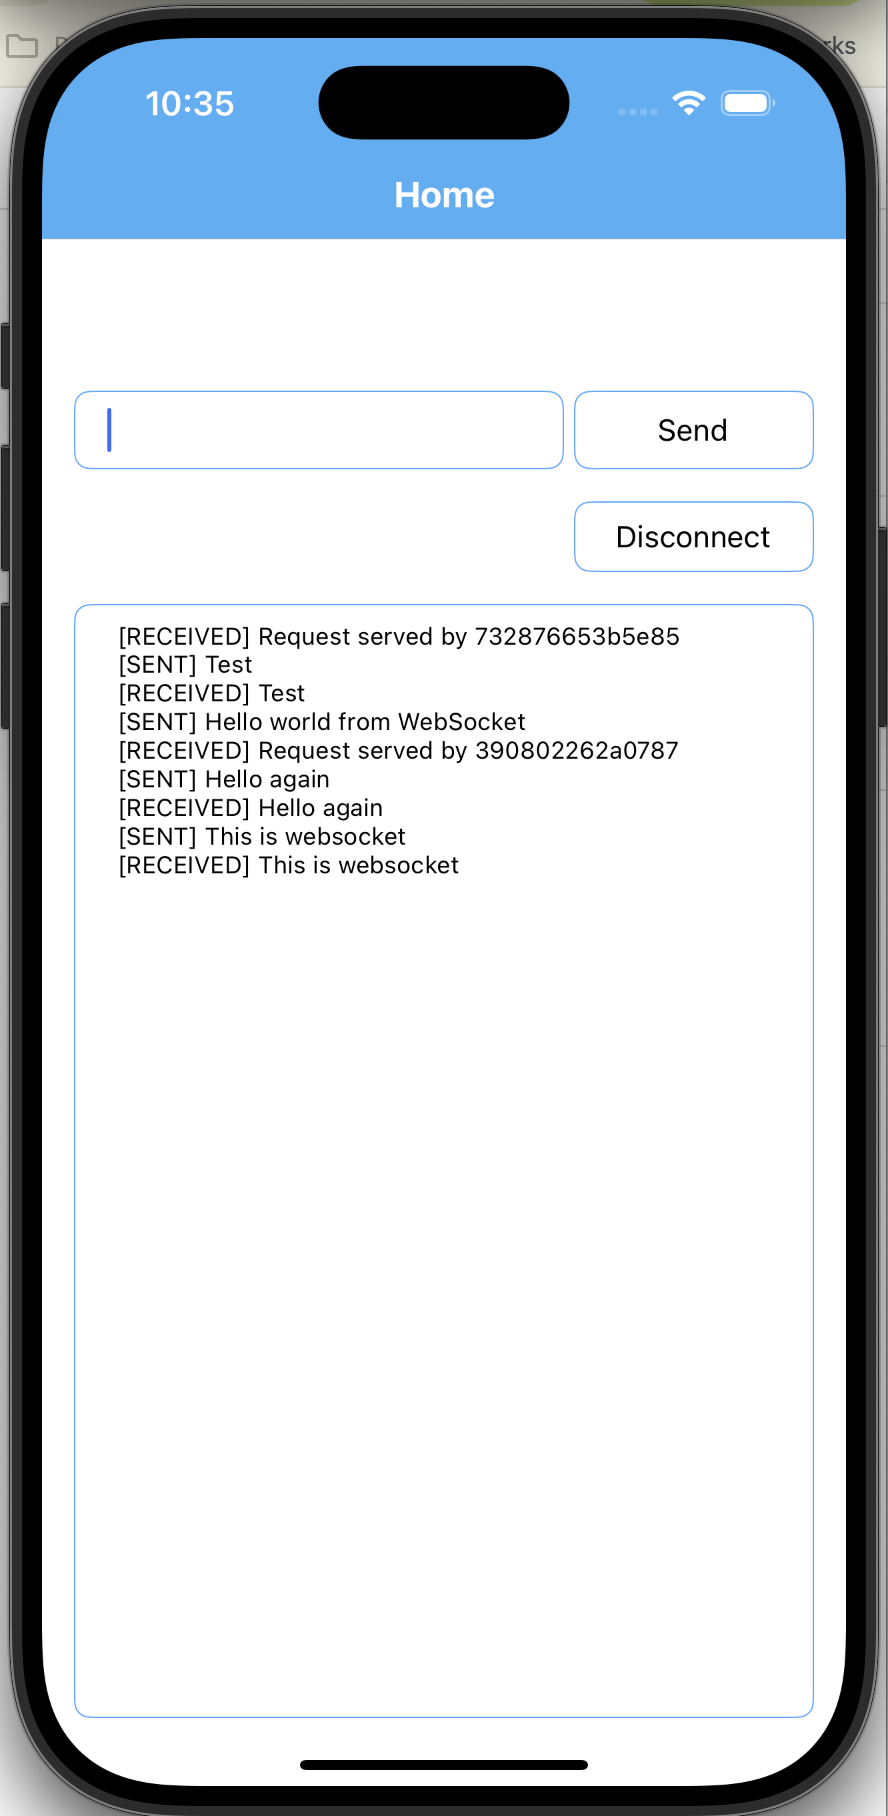
Example message sending & receiving project
Code worth a thousand words. Here is an example chat UI connect and send message to above Echo WebSocket Server for your testing purpose.
GitHub: https://github.com/NewbieScripterRepo/nativescript-websocket-example
Conclusion
WebSocket offers a more efficient way to communicate with your backend in real-time compared to traditional HTTP requests. I hope this article helps you integrate this amazing technology into your app, enhancing user experience smoothly. See you in the next article!